SERVICING CHARLESTON, SC AND SURROUNDING AREAS

Steps to Take When You First Detect Mold in Your Home

Travis Pfeu • May 17, 2024

Mold: an unassuming intruder that can stealthily compromise both the structural integrity of our homes and our personal health. This blog dives into the critical practice of mold detection, offering a comprehensive guide to identifying mold before it becomes a larger issue. Each section of this blog is designed like a detailed annotation of a complex subject, enhancing your understanding and ability to act effectively.


Despite its common occurrence, mold is not always evident until significant damage occurs or health symptoms manifest. Therefore, recognizing the early signs of mold and understanding where it is most likely to develop are crucial steps in maintaining a safe and healthy living environment. This blog will outline the tools, techniques, and tell-tale signs that every homeowner should be aware of to combat mold proactively.


We’ll explore the various common and not-so-obvious habitats of mold in homes, from the obvious moisture-rich bathrooms and kitchens to the less visible backings of drywall and paneled ceilings. By annotating the conditions that favor mold growth with actionable prevention strategies, this guide aims to empower you with the knowledge to not only detect mold but also take swift action to prevent its spread.


Emphasizing quick and effective action, we underscore the importance of addressing mold issues immediately to avoid the escalation of health risks such as allergies and respiratory problems, and to circumvent extensive and costly damage to your home. Through expert insights and annotated advice, you will learn how to maintain a mold-free environment, ensuring your home remains a safe haven for you and your family.


Initial Steps Upon Detecting Mold

Detecting mold in your home can be unsettling. Knowing the initial steps to confirm and assess mold presence is crucial for effective management and ensures that further damage to your health and home is prevented. This section of the blog provides an annotated guide to help you navigate these first crucial steps efficiently.


Confirm the Presence of Mold


Tips for Distinguishing Mold from Other Stains:


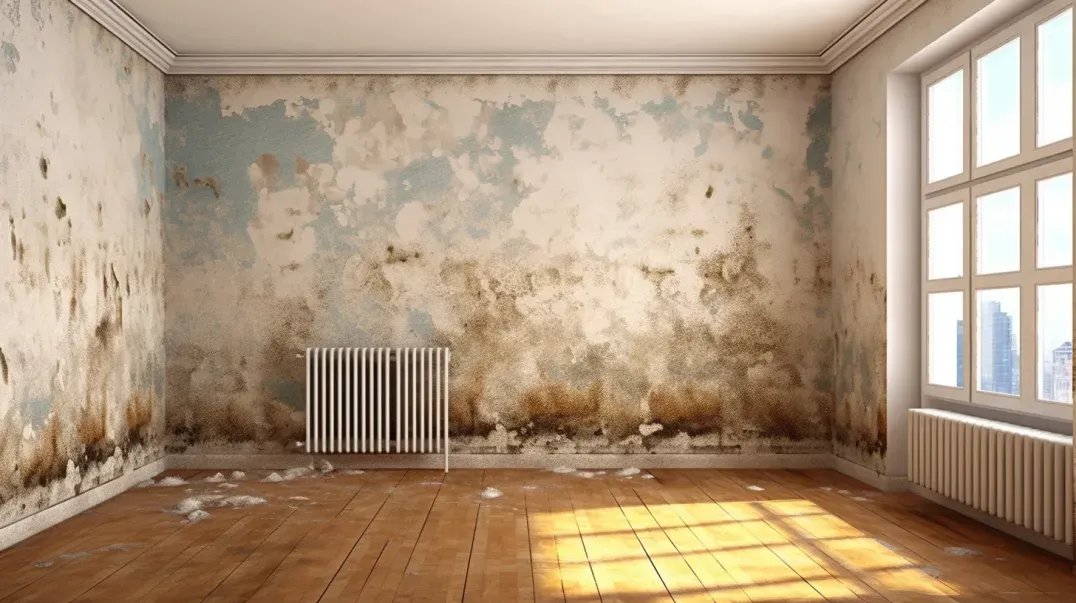
Mold can often be confused with other stains like mildew, which also thrives in damp environments. Mold typically appears as a patch that could be green, black, brown, or yellow and often has a fuzzy texture, whereas mildew usually looks powdery and white or gray. Annotations will include close-up images and descriptions to help you identify mold accurately in your home.


When to Use DIY Testing Kits:


DIY mold testing kits can be a first step to confirm the presence of mold. However, these kits have limitations, including the potential for inaccurate readings and a lack of information on the mold’s hazardousness. Annotated notes will explain when a DIY kit is useful and outline its limitations, helping you decide when it's appropriate to rely on professional testing for more accurate and comprehensive results.


Assess the Extent of Mold Growth


How to Safely Assess the Size and Spread of Mold:


Determining the extent of mold growth is vital for deciding on the next steps. To assess safely, avoid disturbing the area to prevent spores from becoming airborne. Use a flashlight and a mirror to inspect hard-to-reach places. Annotations will provide tips on protective gear to wear during assessment and techniques for minimizing disturbance of the mold.


Guidelines on When to Call Professionals:


If the affected area is larger than 10 square feet, it's generally advised to call professional mold remediation services. This guideline helps ensure that large-scale mold issues are handled safely and effectively, considering the potential health risks and the complexity of complete mold removal. Annotations will detail how to gauge the size of a mold patch and will list signs that indicate a severe mold problem, such as mold in HVAC systems or extensive water damage, which also require professional intervention.


Safety Measures for Handling Mold

When dealing with mold in your home, taking the right safety precautions is crucial to prevent health risks and further spread of mold spores. This section of our blog provides an annotated guide to personal protection and securing the affected area, enhancing your understanding and ability to safely manage mold situations.


Personal Protection


Recommended Protective Gear for Handling Mold:


Handling mold safely requires appropriate protective gear to prevent inhalation and contact with mold spores. Recommended gear includes:


  • Gloves: Nitrile, rubber, or neoprene gloves to avoid direct contact with mold.
  • Masks: An N-95 respirator or better is essential for filtering out mold spores. For extensive mold remediation, a half-face or full-face respirator may be more appropriate.
  • Goggles: To protect your eyes from spores, especially in dusty areas or during activities like scrubbing or demolition.


Annotations will include links to resources where you can purchase these items and visual aids showing the proper use of each piece of safety gear.


Importance of Ensuring Good Ventilation:


Good ventilation is crucial when inspecting and cleaning mold-infested areas. It helps disperse any airborne spores that get disturbed during the process. Open windows and use fans to exhaust air outwards rather than spreading it to other parts of the home. Annotated tips will provide strategies for maximizing airflow and minimizing spore dispersal during mold removal tasks.


Securing the Area


Steps to Contain the Affected Area:


To prevent mold spores from spreading to uncontaminated parts of your home, it's important to contain the affected area. This can be done by:


  • Sealing doors and vents: Use plastic sheeting and duct tape to seal off openings.
  • Covering furniture and vents: Prevent spores from settling in fabrics or air systems.


Annotations will explain the techniques in detail, including how to effectively seal a room and precautions to keep other areas safe.


Advice on Using Air Purifiers with HEPA Filters:


Using air purifiers equipped with HEPA filters can capture airborne mold spores during and after the remediation process. This is particularly useful in preventing the spread of spores to other areas of the house. Annotated advice will detail how HEPA filters work, the best practices for their placement, and maintenance tips to ensure effectiveness.


Cleaning Small Areas of Mold

Addressing small areas of mold promptly can prevent larger infestations and mitigate health risks. This blog section offers comprehensive guidelines for cleaning mold from various surfaces, emphasizing safe and effective methods. Each step and recommendation is annotated to enhance understanding and ensure thorough and safe mold removal practices.


Cleaning Techniques for Non-Porous Surfaces


Instructions for Cleaning Mold from Hard Surfaces Using Water and Detergent:


For non-porous surfaces like tiles, glass, and metals, mold can be effectively cleaned using a simple solution of water and detergent. The steps include:


  1. Preparing the Solution: Mix a mild detergent with warm water.
  2. Scrubbing the Mold: Use a stiff brush to scrub the mold off the hard surfaces.
  3. Rinsing and Drying: Thoroughly rinse the cleaned area with clean water and dry completely to prevent mold recurrence.


Annotations will explain why thorough drying is crucial and how residual moisture can lead to further mold growth.


Recommendations for Antifungal Agents Safe for Home Use:


For tougher mold stains or to disinfect areas after cleaning, the use of antifungal agents such as hydrogen peroxide, vinegar, or baking soda can be effective. Each agent has its own benefits:


  • Hydrogen Peroxide: Effective for killing mold spores due to its antifungal and antibacterial properties.
  • Vinegar: A mild acid that can kill 82% of mold species.
  • Baking Soda: Used to both clean and deodorize moldy areas and helps to prevent future mold growth.


Annotations will include safety tips for using these agents and recipes for creating effective cleaning solutions.


Handling Porous Materials


Guidelines on When Porous Materials Should be Discarded:


Porous materials such as drywall, carpets, and ceiling tiles can absorb mold deeply, making complete removal challenging. These items should generally be discarded if:


  • Extensive Mold Growth: If mold covers a large area or deep penetration is evident.
  • Long-Term Moisture Exposure: Materials that have been wet for over 48 hours are likely to harbor mold and bacteria growth.


Annotations will provide insights into identifying salvageable items and the risks of keeping heavily infested materials.


Best Practices for Removing and Disposing of Mold-Infested Items Safely:


Removing and disposing of mold-infested porous materials requires careful handling to prevent contaminating other areas of your home:


  1. Seal the Materials: Wrap mold-infested items in plastic bags or sheets to contain spores.
  2. Transport Safely: Avoid dragging the bags through clean areas. Take the shortest route out of your home.
  3. Proper Disposal: Dispose of the materials according to local regulations regarding mold disposal.


Annotations will offer detailed tips on safe removal techniques and links to local disposal regulations to ensure compliance and safety.


Addressing the Underlying Cause

Understanding and addressing the root causes of mold is essential to effectively managing and preventing it. This part of the blog delves into common moisture sources and long-term strategies for maintaining a mold-resistant environment. Each point is annotated to enhance understanding and provide actionable advice.


Identifying Moisture Sources


How to Identify Common Moisture Sources Contributing to Mold Growth:


Mold growth is often spurred by excess moisture, which can come from various sources within the home. Key areas to check include:


  • Leaks: Inspect pipes, roofing, and windows for signs of leaks.
  • Condensation: Look for condensation on windows, pipes, or walls, which can indicate high humidity levels.
  • Inadequate Ventilation: Notice if some areas of your home feel stuffy or smell musty, suggesting poor air circulation.


Annotations will provide tips on how to conduct these inspections and what signs to look for that indicate problematic moisture levels.


Tips for DIY Fixes for Minor Moisture Problems:


Addressing minor moisture issues can often be a DIY project, such as:


  • Re-caulking Around Windows: Apply new caulk to seal any gaps where moisture might enter.
  • Adjusting Humidity Levels: Use dehumidifiers or air conditioners to maintain indoor humidity at recommended levels (30-50%).


Annotations will include step-by-step guides for these fixes and recommendations for tools and materials needed to complete them effectively.


Long-Term Moisture Control


Strategies for Maintaining Optimal Indoor Humidity and Ventilation:


Keeping your home dry and well-ventilated is crucial for preventing mold. Strategies include:


  • Regular Use of Vents: Utilize kitchen and bathroom vents to remove excess moisture from cooking and showering.
  • Proper Use of Dehumidifiers: Place dehumidifiers in high-humidity areas like basements during damp seasons.


Annotations will explain how these methods work and the best practices for their use, including maintenance tips to keep equipment running efficiently.


Recommendations for Professional Waterproofing or Drainage Solutions:


In cases where moisture issues are extensive or structural, professional solutions may be necessary:


  • Waterproofing: Consider professional waterproofing for basements or crawl spaces prone to dampness.
  • Drainage Solutions: Installing French drains or adjusting gutter systems can be crucial in redirecting water away from the foundation.


Annotations will detail when to seek professional help, what to expect from these services, and how to choose a reliable contractor.


When to Hire a Mold Remediation Professional

Mold problems can range from minor to severe, and understanding when to call in a professional can save both time and money, while also protecting your health. This section of the blog uses annotations to offer a detailed guide on evaluating the need for professional mold remediation and what homeowners should expect from the process.


Evaluating the Need for Professional Help


Criteria for Hiring a Mold Remediation Expert:


Deciding whether to hire a professional depends on several factors:


  • Size of the Mold Area: Generally, if the mold covers an area larger than 10 square feet, professional help is recommended.
  • HVAC Contamination: If mold is present in your heating, ventilation, and air conditioning systems, it can spread throughout your home, requiring professional cleaning.
  • Contaminated Water: Mold that results from sewage or other contaminated water, known as "black water," poses serious health risks and requires professional remediation.


Annotations will link to additional resources on health risks associated with different types of mold and provide visuals to help homeowners gauge the extent of mold infestation.


How to Find and Select a Certified Mold Remediation Professional:


Choosing the right professional is crucial for effective mold remediation:


  • Certifications: Look for professionals certified by reputable organizations such as the Institute of Inspection, Cleaning and Restoration Certification (IICRC).
  • Experience and Reviews: Check for experience handling mold remediation and read customer reviews.
  • Estimates and Assessments: Professional remediation companies should offer a free assessment and provide a clear, detailed estimate.


Annotations will include tips on interpreting credentials and estimates, and links to certification bodies where homeowners can verify a professional's qualifications.


What to Expect from Professional Mold Remediation


Overview of the Mold Remediation Process:


Understanding the remediation process can help homeowners know what to expect:


  • Containment: To prevent the spread of mold, the affected area will be sealed off using plastic sheeting.
  • Air Filtration: HEPA filters will be used to clean the air of mold spores.
  • Removing Mold-Infested Materials: Porous materials that cannot be cleaned (like drywall and insulation) will be removed and disposed of safely.
  • Cleaning and Disinfection: Non-porous surfaces will be cleaned using antimicrobial agents.
  • Restoration: Removed materials will be replaced or restored.


Annotations will detail each step, explaining the reasons behind them and the technology used, such as the specifics of HEPA filtration and the types of antimicrobial agents typically employed.


Key Questions to Ask Your Mold Removal Service Provider:


Being informed is critical when working with any contractor. Key questions include:


  • What steps will be included in the process?
  • How do you ensure the mold won't return?
  • Can you provide references from previous jobs?
  • What guarantees do you offer on your work?


Annotations will suggest additional questions based on the scope of the project and provide a checklist that homeowners can use during consultations.


FAQs

  • What indicates mold presence?

    Indications of mold include visible growth, a musty smell, or prolonged moisture issues in your home. Mold can appear as spots in various colors (black, white, green, or yellow) on walls, ceilings, or hidden surfaces.

  • First step upon spotting mold?

    If you spot mold, assess the extent of the infestation. If the area is small (less than 10 square feet), you may handle it yourself. For larger areas, consider professional assessment.

  • DIY mold cleaning recommendations?

    For small, non-porous areas, clean with a solution of detergent and water. Do not use bleach indiscriminately; it can be ineffective on porous surfaces and may not kill mold roots, potentially worsening the situation.

  • When to call professionals?

    Call mold remediation professionals if the affected area is large, if mold is in your HVAC system, if you have health concerns, or if the mold comes from contaminated water (like sewage).

  • How to prevent mold spread?

    To prevent mold from spreading, reduce humidity levels in your home (ideally between 30% and 50%), increase ventilation by using exhaust fans and opening windows, fix leaks immediately, and ensure that damp areas are dried within 24-48 hours.

Contact Lowcountry Crawlspaces Today!

Lowcountry Crawlspaces will do everything we can to ensure your experience with us is excellent.

Call Us Now

Request A FREE Estimate

CHECKOUT RECENT POST
By Travis Pfeu November 27, 2024
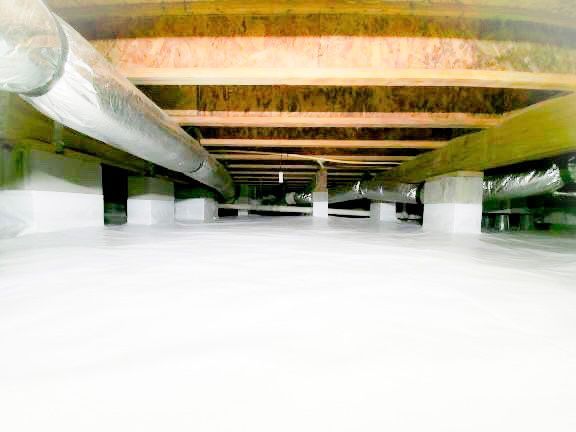
Crawlspace waterproofing in Charleston SC is essential due to the city’s high humidity and frequent heavy rains. This article will guide you on why and how you should protect your crawl space. You’ll learn about the common issues in Charleston crawlspaces, signs that your crawl space needs waterproofing, effective solutions, and why hiring a professional might be the best choice. Key Takeaways Crawlspace waterproofing is essential for protecting homes from mold, structural damage, and energy loss due to moisture issues, especially in Charleston’s humid climate. Signs that indicate the need for waterproofing include persistent standing water, strong mold odors, and humidity levels over 50%, which can lead to serious health risks. Effective solutions for crawl space waterproofing include encapsulation with a vapor barrier, sump pump installation, and maintaining proper ventilation to manage moisture levels. Understanding Crawlspace Waterproofing Crawl space waterproofing is a critical aspect of home maintenance that often gets overlooked. This process involves implementing measures to prevent moisture from entering the crawl space, thereby protecting it from water damage, mold, and structural issues. A damp crawl space can lead to a myriad of problems, including mold and mildew growth, compromised indoor air quality, and health issues like respiratory problems. Moreover, excess moisture can increase humidity levels, leading to higher energy costs and discomfort within the home. Effective crawl space waterproofing not only protects your home from costly repairs but also improves energy efficiency and indoor air quality. By sealing out moisture, you can prevent wood decay and the loss of structural integrity, which are common issues in unprotected crawl spaces. Neglecting this crucial aspect of home maintenance can result in extensive damage to your property over time, especially if the crawl space waterproofed. In essence, ensuring your crawl space is adequately waterproofed is not just about maintaining the structural integrity of your home; it’s about creating a healthier living environment. From avoiding mold infestations to improving your home’s energy efficiency, the benefits of crawl space waterproofing are significant and far-reaching. Common Issues in Charleston Crawlspaces Charleston’s climate poses several challenges for homeowners, particularly when it comes to maintaining a dry crawl space. High humidity levels can lead to significant problems such as mold growth and structural damage. When excess humidity in the crawl space leads to condensation, it results in wood rot and mold, further compromising the structural integrity of your home. Groundwater saturation from heavy rains is another common issue in Charleston. Water accumulation in the crawl space can cause damage to the foundation and flooring structure. Additionally, it can negatively impact the air quality within your home. If standing water exceeds an inch or two, it poses serious risks to your home’s foundation. Additionally, increased humidity can lead to mold growth in flooded crawl spaces, making it crucial to address these issues promptly. Saturated soil can exacerbate these problems. Signs that indicate crawl space problems include standing water, rust, mold, and musty odors. Excess moisture can also attract pests, leading to infestations that further exacerbate the problem. Addressing these issues through proper crawlspace waterproofing can prevent dampness, mold, pests, and structural damage, ensuring a dry and healthy crawl space. Signs Your Crawl Space Needs Waterproofing Recognizing the signs that your crawl space needs waterproofing is essential to prevent serious damage. Persistent standing water in your crawl space for over a day is a significant red flag. This indicates a problem that, if left unaddressed, could lead to severe water damage. Another critical warning sign is a strong mold or mildew odor emanating from the crawl space. Mold can start growing within 48 hours in damp conditions, making it crucial to address any moisture issues promptly. High humidity levels over 50% promote mold growth and require immediate attention. Signs of moisture issues in a crawl space include dampness, condensation, and water pooling. Homeowners can use a moisture meter to measure humidity levels in their crawl space, helping to identify potential problems early. Additionally, water stains, peeling paint, and rust on metal surfaces are indicators of moisture problems that need to be addressed. By being vigilant and recognizing these signs, you can take proactive steps to waterproof your crawl space, preventing water damage and ensuring a healthier living environment. Addressing these issues early is better than dealing with costly repairs that can result from neglect. Effective Crawlspace Waterproofing Solutions There are several effective solutions to keep your crawl space dry and free from moisture-related problems. One of the most comprehensive approaches is crawl space encapsulation, which involves sealing the area with a vapor barrier to control humidity and improve air quality. Installing dehumidifiers can also be an effective way to manage moisture levels in the crawl space. Another crucial aspect of crawlspace waterproofing is ensuring proper drainage. This can include installing sump pumps and French drains to effectively manage water and prevent it from accumulating in the crawl space. Understanding these solutions in more detail will help keep your crawl space dry. Installing a Vapor Barrier A vapor barrier is a key component in crawl space waterproofing, designed to prevent moisture from entering the space and causing damage. This plastic barrier also protects mechanical appliances by keeping moisture out, which can be crucial for maintaining their longevity. A well-installed vapor barrier effectively keeps floodwaters under the plastic and directs them to the drain system. The best method to seal a crawl space is through encapsulation with a heavy-duty vapor barrier. To install one, it should be laid flat over the floor and up the walls, secured with adhesive or fasteners, with seams overlapped by at least 6 inches and sealed using waterproof tape. A high-quality vapor barrier with a thickness of at least 6-mil, preferably 10 to 20-mil, is recommended for optimal performance. During installation, ensure that the seams of the vapor barrier are overlapped a minimum of 6 inches and sealed properly with crawl space seam tape. If the vapor barrier shows signs of damage, it should be inspected and repaired with tape for small tears or replaced for larger damages. This meticulous approach ensures that your crawl space remains dry and protected from moisture. Sump Pump Installation and Maintenance A reliable sump pump is essential for the health of your home, as it prevents flooding by collecting excess water and pumping it away. During installation, ensure the discharge location is directed to a pop-up emitter in the yard, flowing downhill and away from your home. The sump pump basin should be placed in the lowest part of the crawl space to effectively collect water. Annual maintenance, as per the manufacturer’s recommendations, is crucial for the effective operation of your sump pump. Essential maintenance steps include testing the pump. Additionally, it involves flushing it out and removing debris from the basin. Having a check valve can prevent water from flowing back into the basin, reducing wear on the sump pump. For emergencies, a battery-operated backup sump pump is recommended to ensure continued operation during power outages. Regular maintenance and proper installation ensure that your sump pump remains functional and effective in protecting your home from water damage. French Drains for Crawl Spaces French drains are designed to encourage water runoff away from the foundation of your home. The main components of a French drain include a trench, gravel, and a perforated pipe. A fabric developed to filter out dirt, sand, and other debris is used to protect the drainage system in French drains. The installation process involves identifying the water area, digging a trench, placing the pipe, and filling it with gravel. The pipe in a French drain should have a slope of 1 to 2 percent to ensure proper drainage. Proper installation of drainage in a crawl space may also require digging a trench along the interior perimeter and installing a geochannel track. An exterior French drain alone is insufficient to repair an already flooding crawl space. A comprehensive approach, including interior drain tile drainage solutions, is often necessary to ensure your crawl space remains dry. The Role of Proper Ventilation Proper ventilation in a crawl space is essential for controlling moisture. The stack effect allows humid air from a crawl space to rise into the living areas of a home, affecting indoor air quality. Properly designed ventilation systems are often required by building codes, particularly in areas prone to moisture. Different regions may have varying standards for crawl space ventilation based on local climate and soil conditions. Ensuring that vents are not obstructed by debris, leaves, or other materials that can trap moisture is crucial. Using a hygrometer can help track humidity levels and prevent moisture-related issues. Keeping humidity levels below 60% is crucial to preventing mold growth in crawl spaces. By controlling humidity, you can significantly reduce the risk of mold growth and improve the overall air quality in your home. Choosing the Right Insulation Selecting the right insulation for your crawl space is vital for maintaining energy efficiency and preventing moisture problems. Rigid foam insulation is a popular choice for crawl spaces because it’s moisture-resistant and retains insulating properties. Spray foam insulation can effectively fill gaps and create an air barrier, enhancing energy efficiency. Other options include mineral wool insulation, which offers fire resistance and moisture protection, and cellulose insulation, which is mold-resistant and made from recycled materials. The R-value of insulation is crucial as it reflects thermal resistance, with higher values indicating better insulation performance. Effective waterproofing combined with proper insulation ensures a dry and energy-efficient crawl space, making it essential to hire a waterproofing contractor. Why Hire Lowcountry Crawlspaces for Waterproofing Lowcountry Crawlspaces has been a leading provider of crawl space solutions in Charleston since 2018. The company focuses on quality, customer satisfaction, and competitive pricing. Travis, the founder, started the company after gaining eight years of experience in the water disaster restoration industry. Last year alone, Lowcountry Crawlspaces served over 615 families in the Charleston area. The team has grown to over 20 dedicated professionals, with Travis being an IICRC-certified technician. Lowcountry Crawlspaces is confident in handling any challenges related to crawl spaces, making them a trusted choice for waterproofing needs. Maintenance Tips for a Dry Crawl Space Proper crawl space maintenance is essential to improve the health and safety of a home in Charleston’s humid environment. Regular maintenance helps prevent long-term moisture problems and serious health risks. Moisture issues in crawl spaces can significantly affect indoor air quality, with up to 40% of household air passing through these areas. Regularly inspect and reapply sealants to maintain effectiveness against water and pest intrusion. The key to ensuring a dry crawl space is regular maintenance. Here are some specific maintenance tips to keep your crawl space dry. Routine Inspections Homeowners should perform inspections at least twice a year to identify any issues early. Routine inspections should be part of a homeowner’s maintenance schedule to detect issues early. It is advisable to inspect the crawl space for signs of pests, as they can contribute to moisture problems. Regular inspections are crucial for identifying potential issues in crawl spaces before they escalate. Cleaning and Checking Vents Regularly check vents for blockages that can restrict airflow in your crawl space. Clean vents to remove dust, debris, and other obstructions that may hinder airflow. Cleaning and checking crawl space vents is crucial for maintaining proper airflow and preventing moisture buildup. Regular vent maintenance helps to improve air quality and reduce the risk of mold and moisture-related issues. Ensuring that vents remain clear and functional is a simple yet effective way to maintain a dry crawl space. Monitoring Humidity Levels In Charleston, SC, crawlspace humidity levels are challenging due to the warm and humid climate, which can lead to excessive moisture problems. High humidity in crawl spaces can contribute to mold growth and wood rot, seriously affecting a home’s structural integrity. Homeowners should watch for signs of humidity issues, such as musty smells and visible mold growth in their crawl spaces. Installing a vapor barrier is a crucial step in controlling humidity and reducing moisture levels in crawl spaces. Regular maintenance of sump pumps ensures effective removal of excess water and protects against humidity-related issues. Implementing drainage systems such as French drains can help divert water and reduce humidity levels around your foundation. Maintaining proper ventilation in crawl spaces is vital for preventing moisture buildup and promoting air circulation. Summary In summary, crawlspace waterproofing is essential for maintaining the health and structural integrity of your home, especially in a humid climate like Charleston, SC. By understanding the common issues that affect crawl spaces, such as high humidity and groundwater saturation, homeowners can take proactive steps to protect their homes. Recognizing the signs that indicate your crawl space needs waterproofing, such as standing water and mold odors, allows you to address problems early and avoid costly repairs. Effective waterproofing solutions, including installing vapor barriers, sump pumps, and French drains, and ensuring proper ventilation and insulation, are critical to keeping your crawl space dry. Regular maintenance, such as routine inspections, cleaning vents, and monitoring humidity levels, further ensures your crawl space remains in good condition. Trusting professionals like Lowcountry Crawlspaces for waterproofing needs guarantees quality and peace of mind. By taking these measures, you can safeguard your home and improve its overall air quality and energy efficiency. Frequently Asked Questions Why is crawlspace waterproofing important? Crawlspace waterproofing is crucial because it keeps moisture out, safeguarding your home from mold, structural damage, and unhealthy indoor air. It’s a smart move for a healthier living environment. What are common signs that my crawl space needs waterproofing? If you're noticing standing water, moldy smells, or rust on metal, it's a clear sign your crawl space might need waterproofing. Don’t ignore these issues to keep your home safe and dry! What are the benefits of installing a vapor barrier in my crawl space? Installing a vapor barrier in your crawl space keeps moisture out, protects your appliances, and helps manage floodwaters, creating a dry and healthy environment. It's a smart step for better home protection! How often should I perform maintenance on my crawl space? It's best to perform crawl space maintenance at least twice a year, checking for moisture and cleaning vents to avoid problems. Keeping on top of this will help protect your home! Why should I hire Lowcountry Crawlspaces for waterproofing services? Hiring Lowcountry Crawlspaces for waterproofing services is a smart choice because their expertise and commitment to customer satisfaction ensure you’ll get quality results. With years of experience, they’re ready to tackle any crawl space challenges you may face.
By Travis Pfeu May 31, 2024
Maintaining a healthy indoor environment involves more than just regular cleaning and maintenance—it requires careful attention to the factors that contribute to mold growth. Among these, indoor humidity levels play a pivotal role. This blog delves into the critical connection between humidity and mold, shedding light on how controlling moisture in the air can prevent mold infestations and protect both your home and health. Mold thrives in damp conditions, making humidity a primary factor in its growth and proliferation. When indoor humidity levels rise above the ideal range of 30-50%, the likelihood of mold growth increases significantly. This is particularly true in areas prone to moisture, such as bathrooms, kitchens, basements, and attics. By understanding the relationship between humidity and mold, homeowners can take proactive steps to manage indoor moisture and reduce the risk of mold. This blog will explore the science behind humidity and mold growth, explaining how excess moisture creates an ideal environment for mold spores to settle and expand. We will discuss practical strategies for monitoring and controlling indoor humidity, including the use of dehumidifiers, proper ventilation, and regular inspections. Additionally, we will highlight the health implications of mold exposure, emphasizing why it’s essential to maintain optimal humidity levels in your home. Through detailed insights and practical advice, this blog aims to empower homeowners with the knowledge and tools needed to manage indoor humidity effectively. By doing so, you can create a safer, healthier living space, free from the persistent threat of mold. 
By Travis Pfeu May 29, 2024
Choosing a qualified and reliable mold remediation service is crucial for ensuring effective and safe mold removal. Mold can pose significant health risks, including respiratory problems, allergies, and even more severe conditions for those with compromised immune systems. Additionally, improper mold removal can lead to its recurrence, causing further damage to property and health hazards. A professional mold remediation service brings expertise and the right tools to thoroughly eliminate mold, preventing its spread and recurrence. By selecting a dependable service, you safeguard your home and health, ensuring that mold is removed efficiently and safely. The peace of mind that comes with knowing the job is done right is invaluable, highlighting the importance of making an informed choice in mold remediation services. 
See More

Schedule Your FREE Crawl Space Evaluation Today

There Is No Crawl Space Job We Can’t Fix!

843-259-8194
Share by: